Here you will learn how to make your own alphabets to have and store for future use.
I am going to teach you how to make them individually first, then how to put the entire alphabet on one frame.
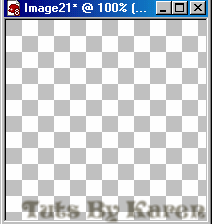
Open a new transparent image 200x200
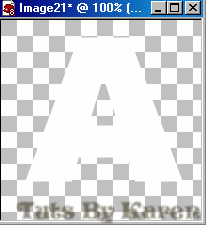
Use your text tool to type an A in white at 150 pixels. On your layers palette right click on that layer it should be in vector, choose convert to raster layer.
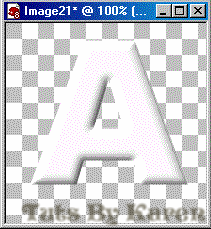
Go to effects-3d effects-inner bevel and apply these settings: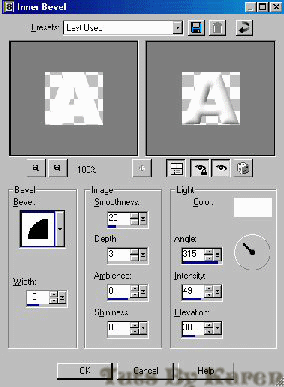
Here it is so far:
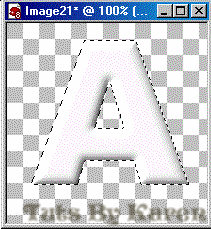
Selections-select all. Get out your magic wand and touch the image. You will now have the infamous marching ants.
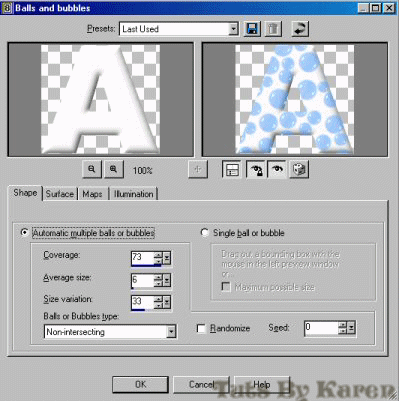
Just for this tutorial we will use the balls and bubbles effect new to PSP. Effects-Artistic effects-balls and bubbles, apply these settings:(don't worry about any tabs I didn't show you)Under the shape tab:.
Under the surface tab: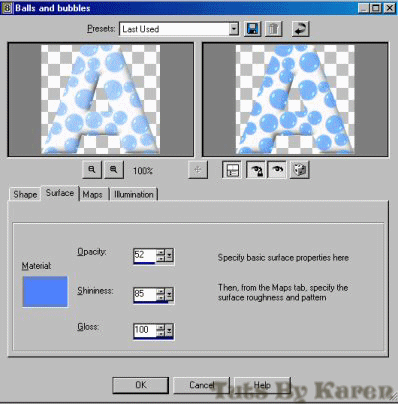
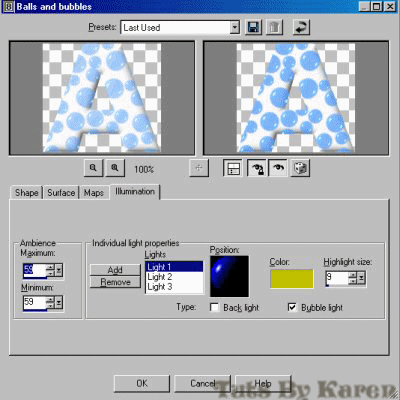
Under the illumination tab:
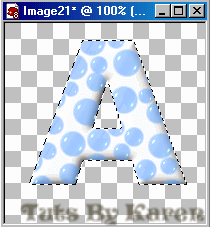
Ta dah!!!
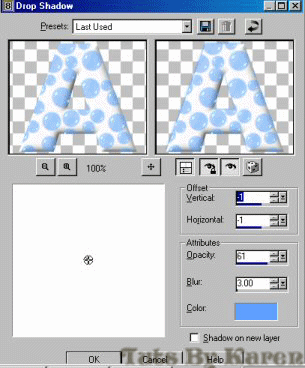
Selections-select none. Apply drop shadow:
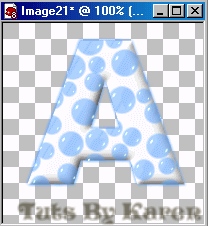
Here is your finished A.
Finished A on a background:

You can experiment and make all sorts of effects and fonts for your own alphabets! It is fun.
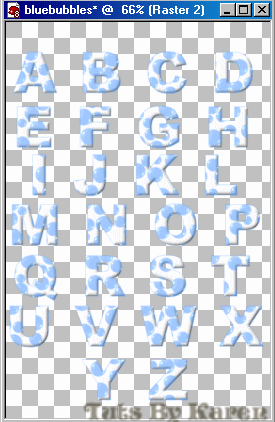
Now I will show you how to make the entire alphabet at one time.
Open a new image 800x1000. Use the same text settings but at 125 pixels. Type in the alphabet 4 at a time.
Go back tot he top of this tutorial and apply the same steps. Here is my result:
You can save these as a tube or in psp format.
In psp format when you want to use your letters, take out your selection tool set at rectangle, drag a box to encircle the letter you want to use:
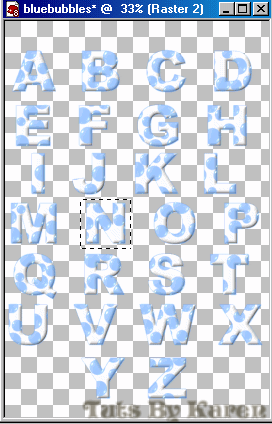
Right click on the blue area at the top of the graphic and chose copy.
Paste as a new layer on the image you want to place the letter on. All other letters you use in the new graphic paste as a new selection.
Here is my name using this technique:

Here are other alphabets I have made:


I purposely left out the alphabets with graphics attached so you will be more creative to make your own.
I am such a spoil sport aren't I? ;)
I hope you enjoyed this tut and will come up with terrific alphabets!!
Remember that all members of my group who join Animation school will get assignments based on my tutorials.
Have a great one!
Karen
Please note that this tutorial is for the use of registered members only and cannot be linked to by any individual or group and cannot be used for any purpose without written authorization
of Karen Jonsson. Registered users only, may print the lesson off for future reference and strictly for personal use only. |