Ok Let's start. Download this blinkie template:Template
Open it up in psp, copy it, and close out the original. You want to keep it to make all the blinkies you want later.

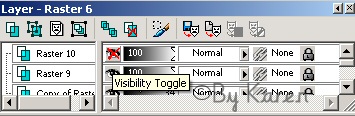
Look at your layers palette, it should look like this: 
Zoom in on your template twice, (use the + sign on the numbers part of your keyboard or you can go to view-zoom in by 1 twice) 
Highlight the bg on the layers palette, hide the other layers by clicking each little glasses icon.
Flood fill with the color you want.
I used light blue. 
Unhide the other layers.
Now write what you want on the lettering layer. Adjust the letters as you like. Hide all layers except the lettering and the layer you just wrote on. Right click one of the 2 and choose merge-merge visible.
Go to your layers palette, highlight dots 1. Selections-select all. You will see marching ants around the edges of the entire graphic.
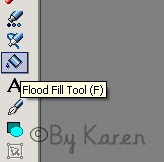
Get out your magic wand and
click the graphic. You should see the gray dots floating.

Flood fill(I used yellow) using these settings: 
Selections-select none. Save as frame 1. Here's what you should have:

Ok now undo untilright before you had the marching ants.
Go to your layers palette and highlight dots2. Again selections-select all.
Magic wand-click the graphic, now the black dots should be highlighted. Flood fill with the same color you used for the gray dots. Selections-select none.
Save as 2.
Go to animation shop, using your animation wizard open up both frames set at 10. Preview your animation. If all is well save as a gif, and you are done.
Here are my 2 examples.


Hope you have enjoyed doing this tutorial and it was easy for you.
If not let me know.
~Karen
Please note that this tutorial is for the use of registered members only and cannot be linked to by any individual or group and cannot be used for any purpose without written
authorization
of Karen Jonsson. Registered users only, may print the lesson off for future
reference and strictly for personal use only.